
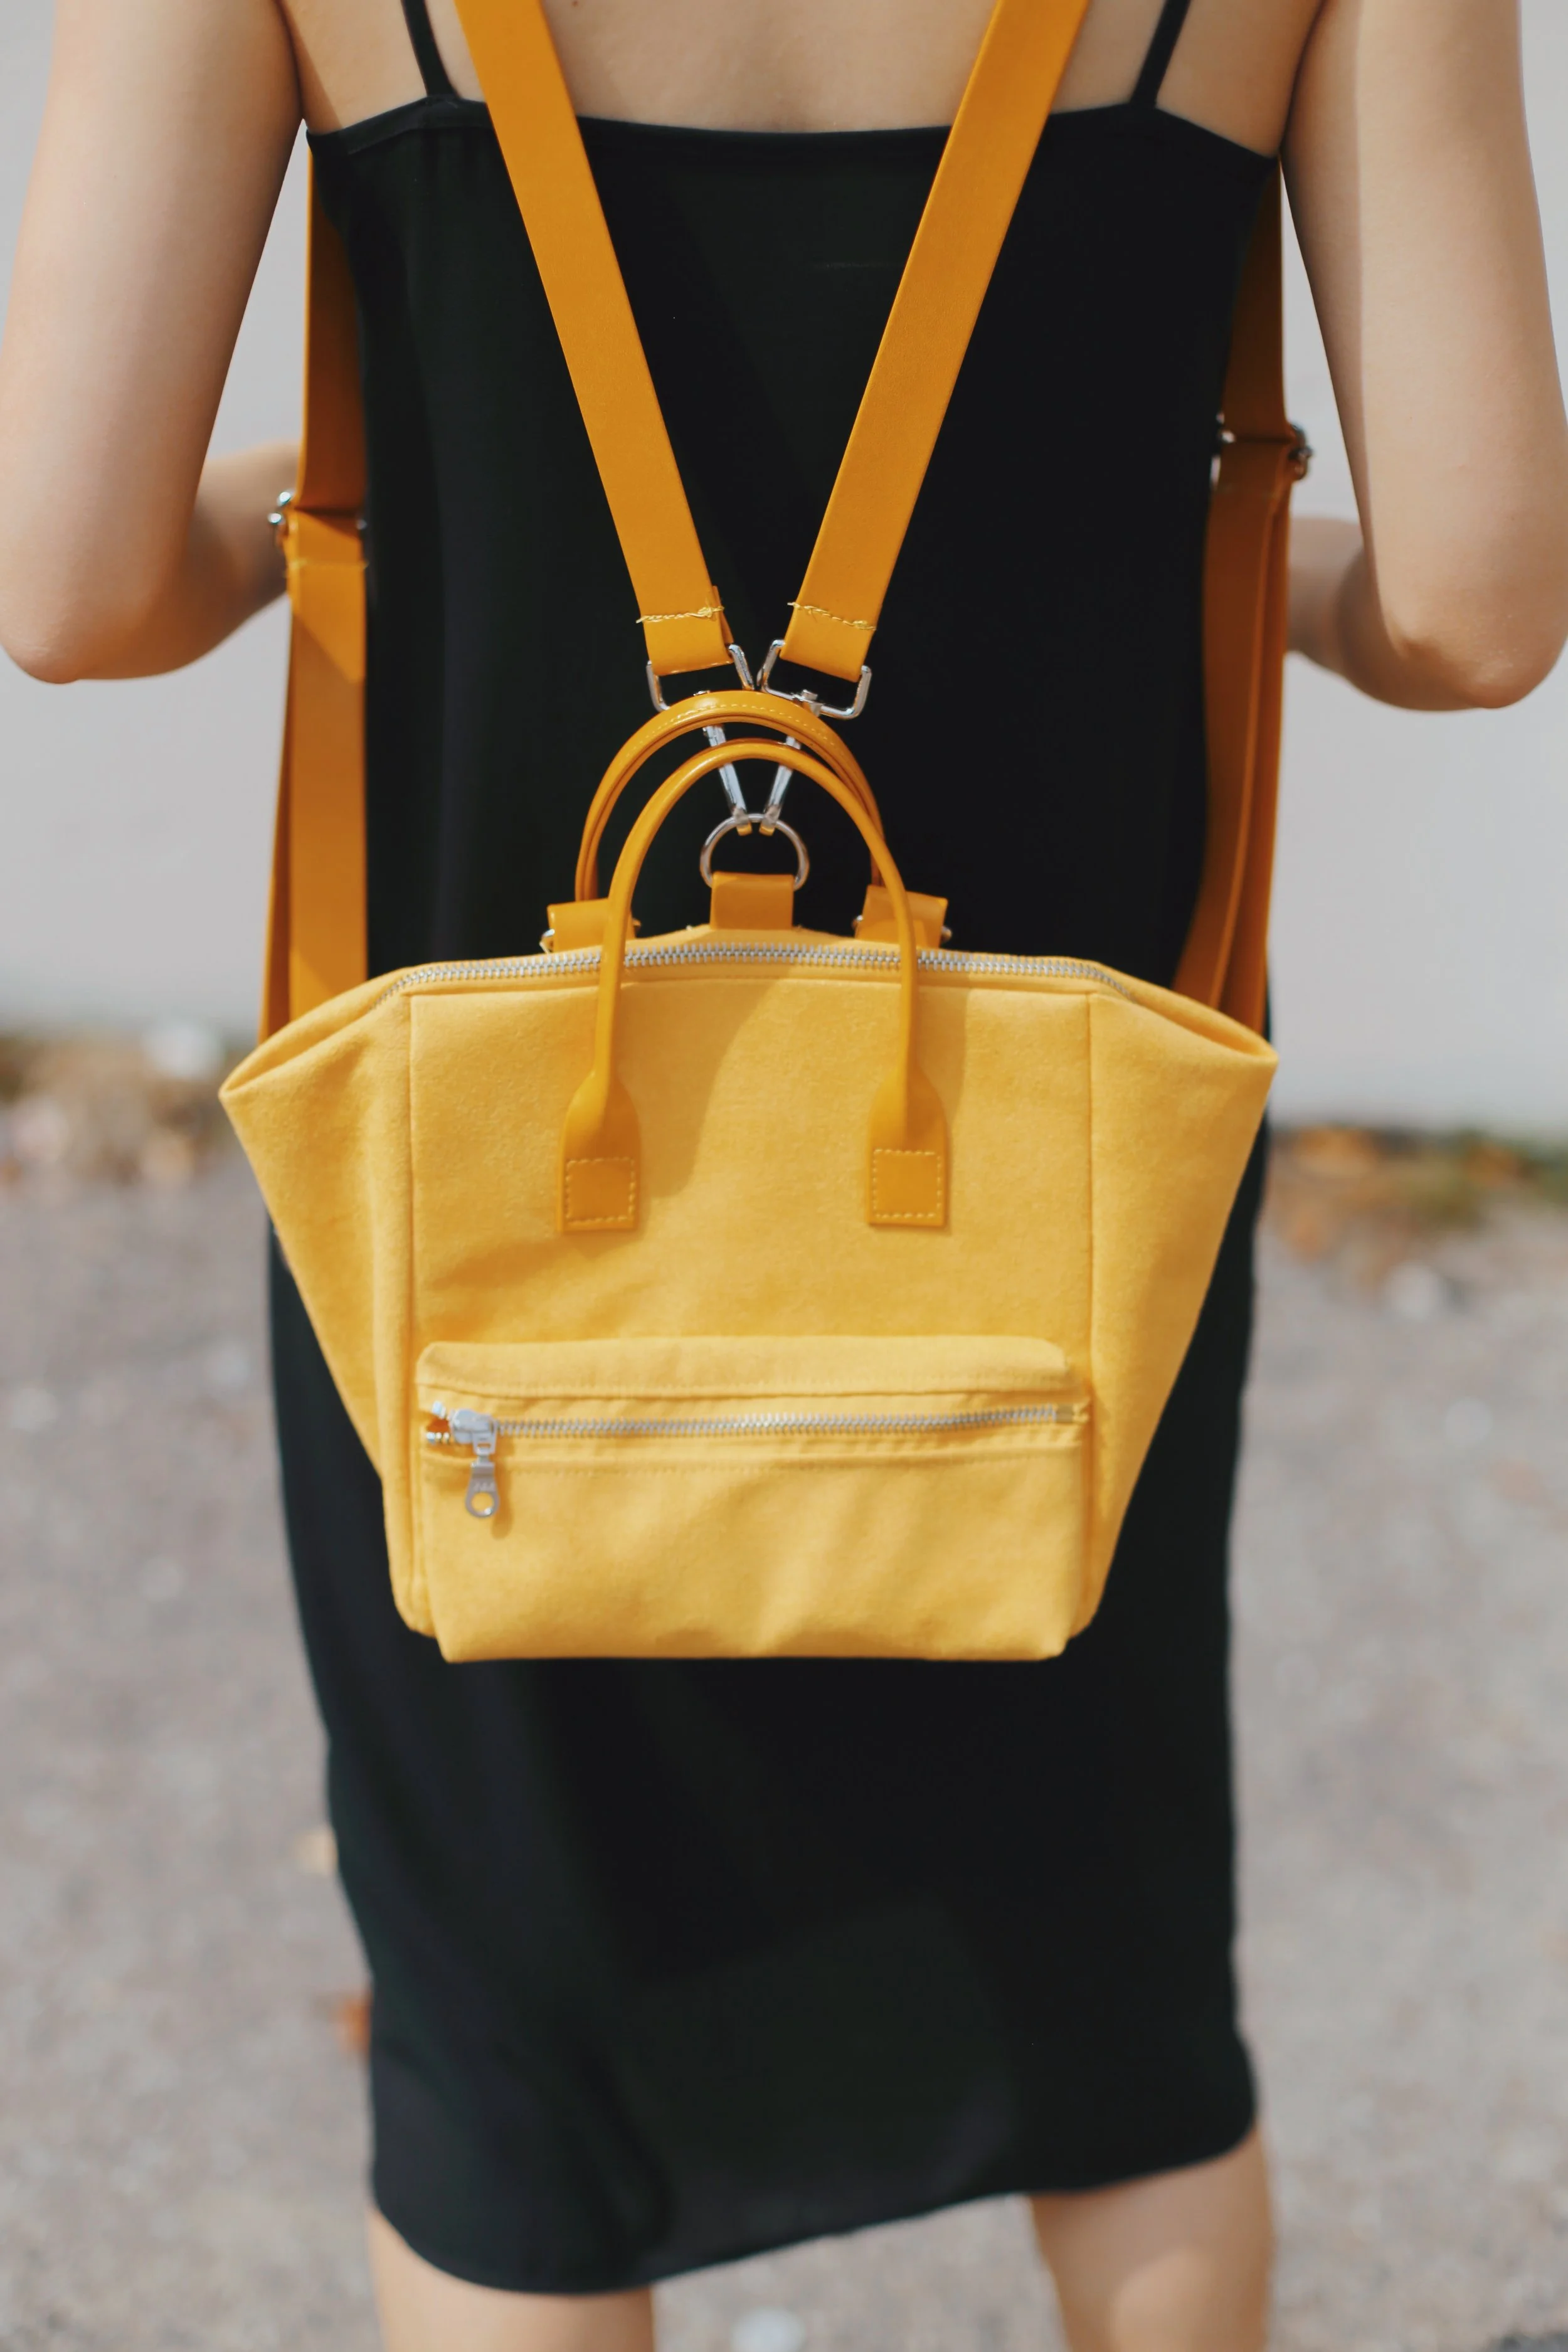
DIY: Mini Backpack (Anello Style)
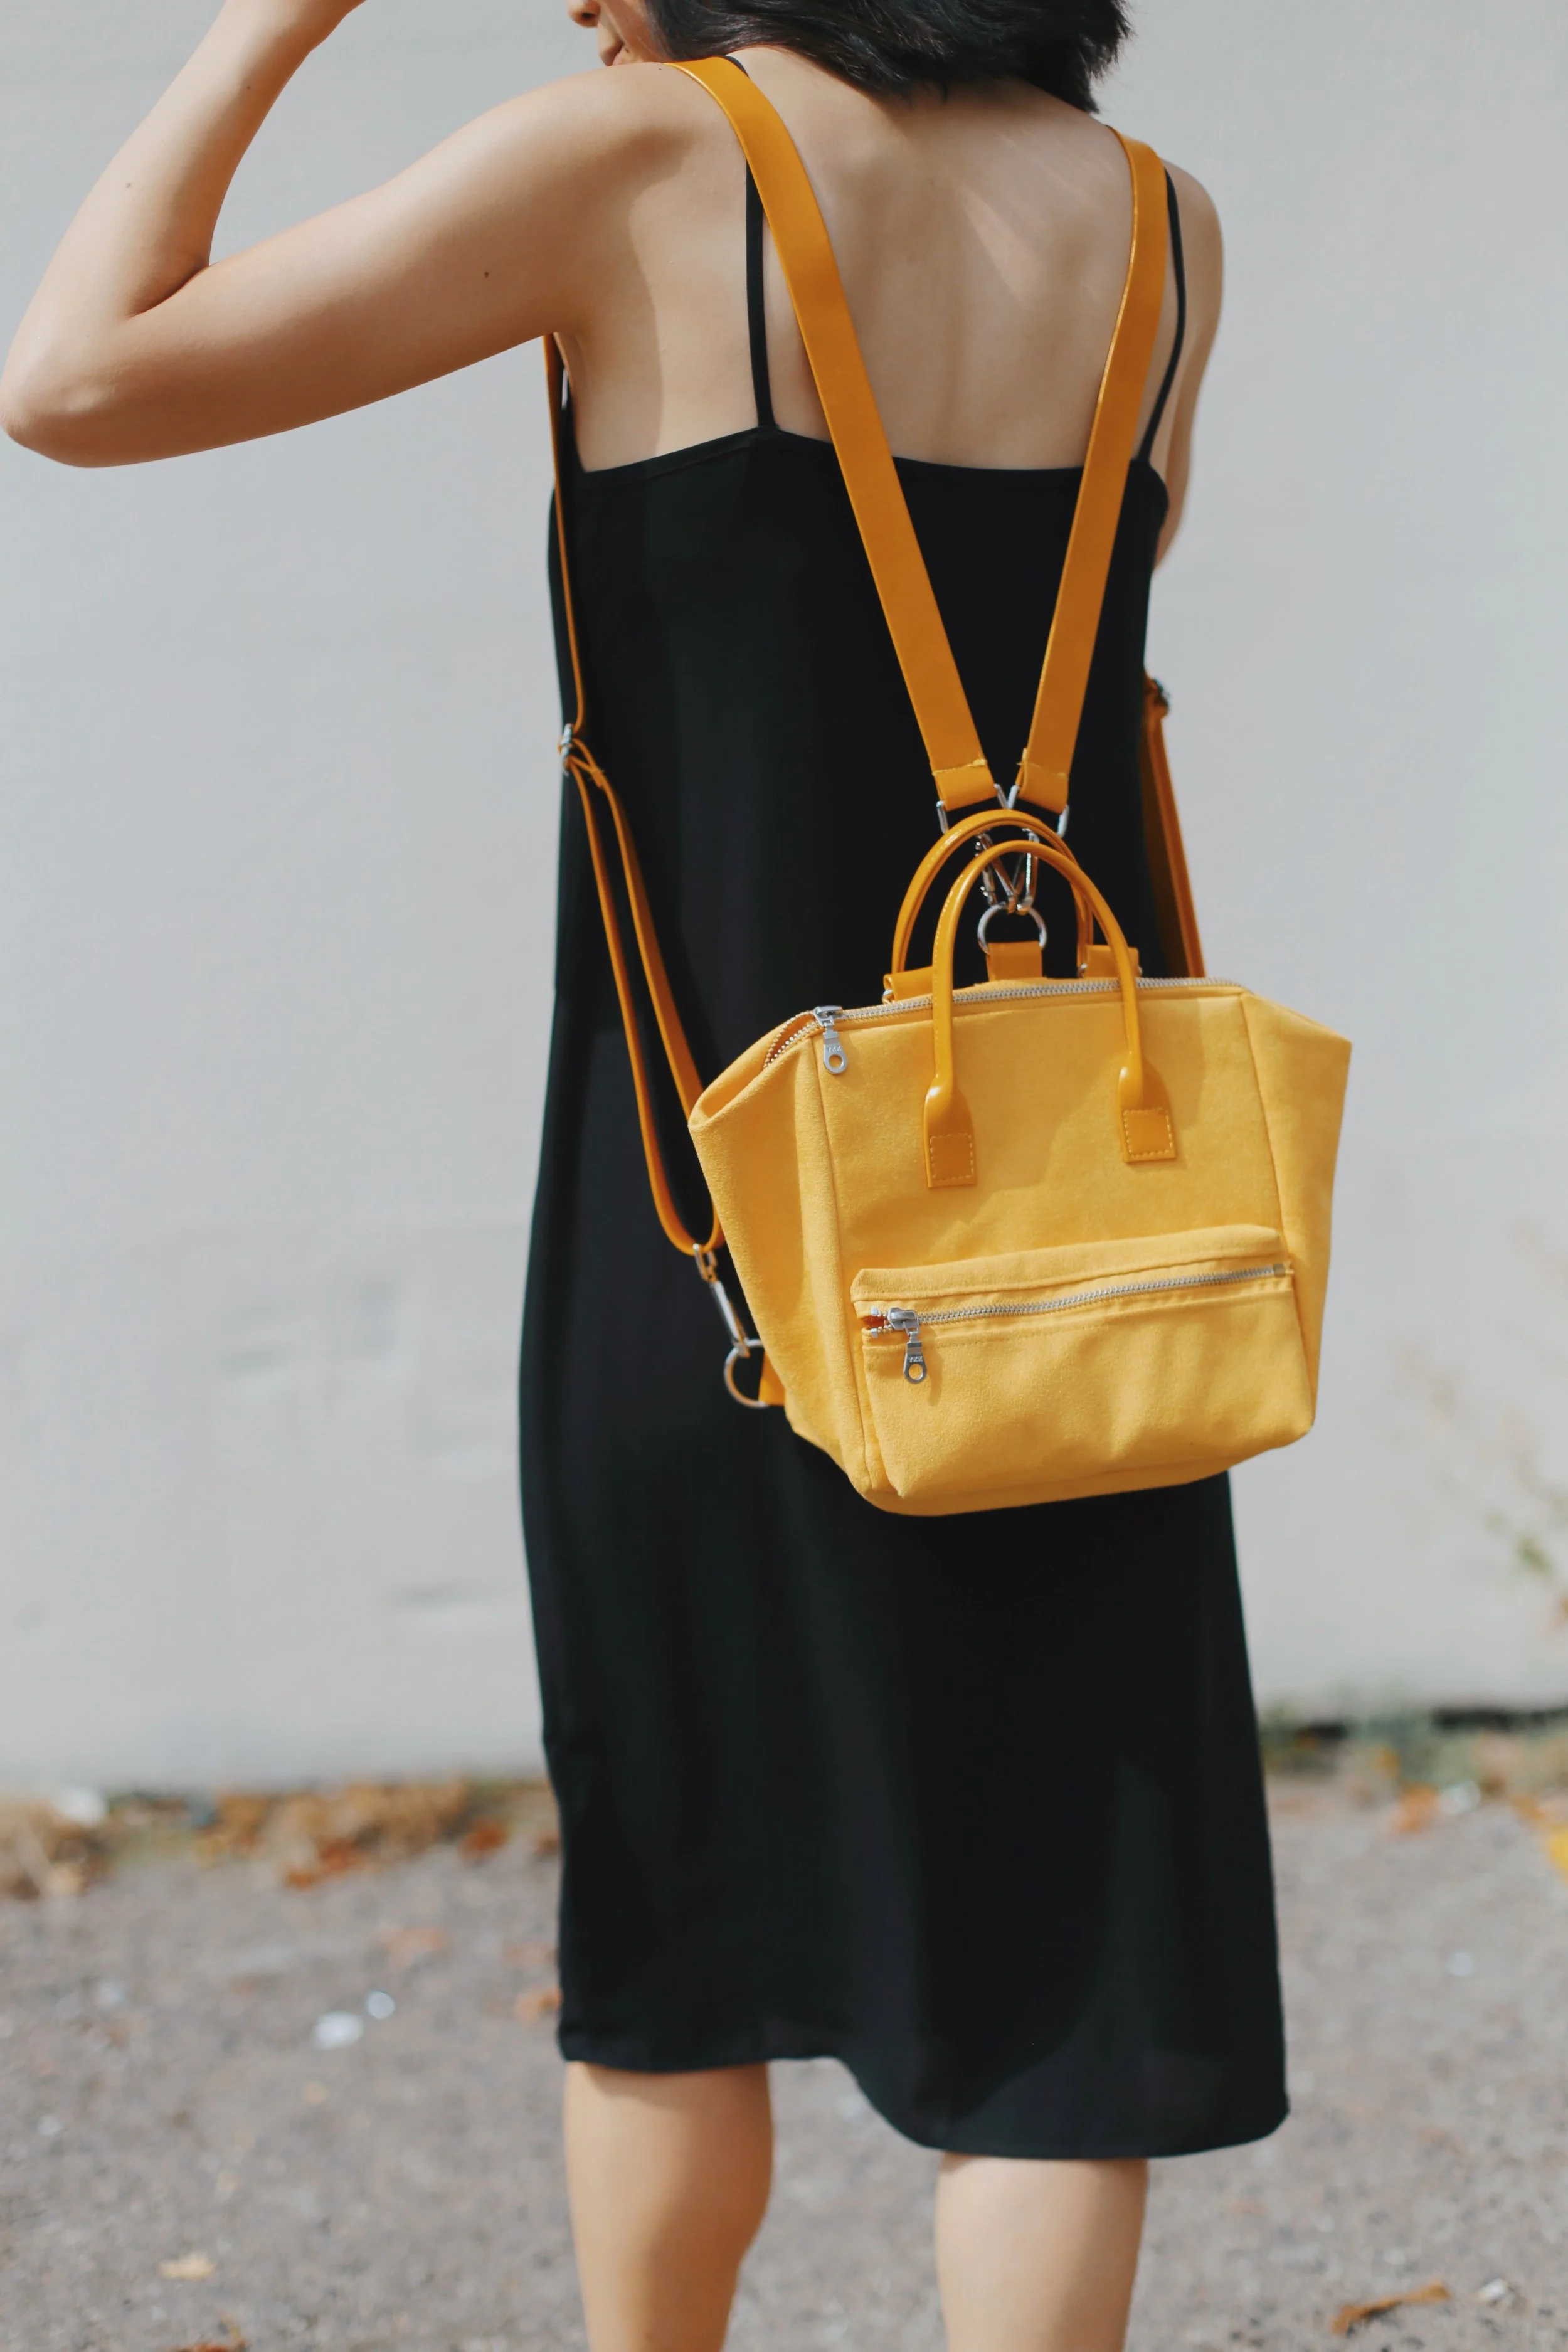
In the last year, there's been too many instances where the Anello-style backpack has waved at me, through friends, shop windows, passing tourists, and maternity knockoffs (this is when you know it's serious). It's zipper opening allows a surprisingly-large interior volume and like all well-loved backpacks it comes in so many colours. When you've got a good thing going, try it with more colour!
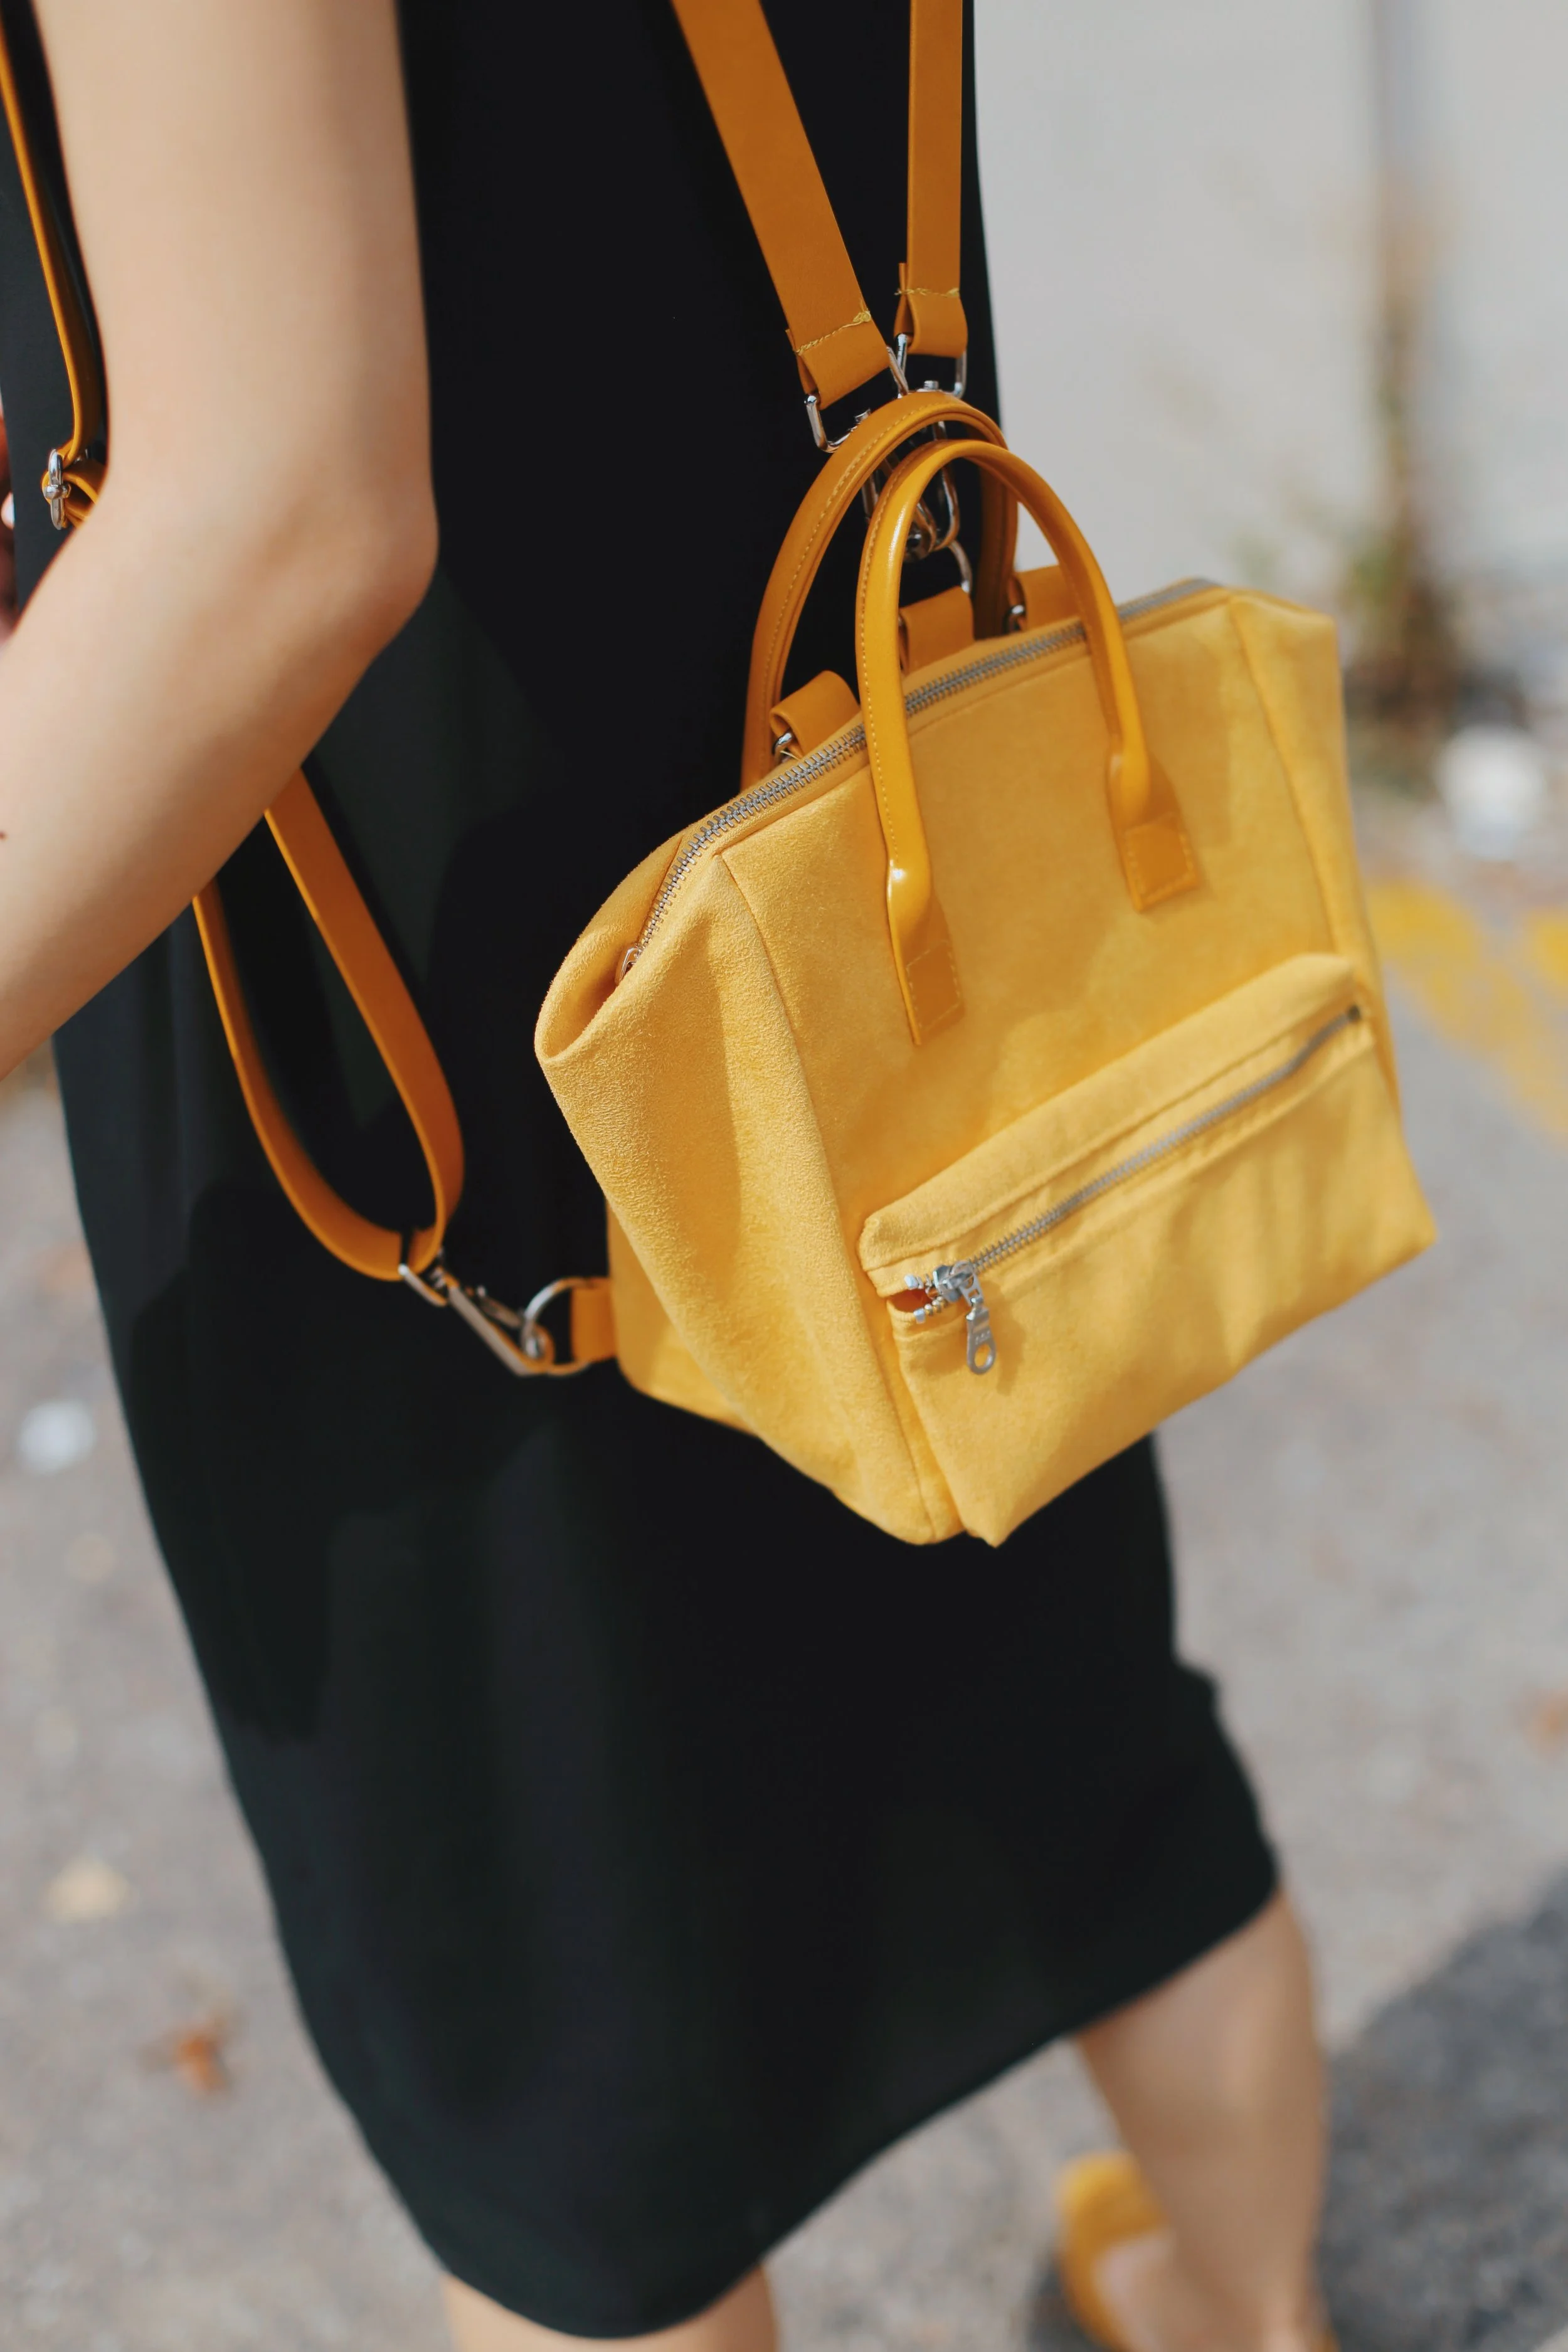
I'm also very into the LV Palm Springs backpack for its mini size and convertible straps, alternating from backpack to crossbody to top handle toting. I am not, however, into the price tag at the moment. This brings us to today's bag concoction: Anello-style mini backpack with convertible straps in a punchy colour, even better if it can look slightly luxe.

MATERIALS
0.5 yard fabric (from the upholstery section which helps with durability)
0.5 yard fusible interfacing (went with a very stiff option)
4 yards of yellow faux leather strap, 1" width)
2 zippers (one 8" and one 14")
4 silver hooks
2 silver sliders
3 D-rings
2 Triangle rings
Matching upholstery thread (the thicker thread is more durable and looks good)
If you'd like to see how I got my custom zippers made, skip to 4:47 below:
DIMENSIONS I CUT
2 fabric squares for front and back (24 cm x 24 cm each)
2 interfacing squares for front and back (24 cm x 24 cm each)
1 fabric rectangle for bottom (24 cm x 17 cm)
1 interfacing rectangle for bottom (24 cm x 17 cm)
2 fabric rectangles for sides (24 cm x 17 cm each)
1 small strip for top of pocket (29 cm x 4 cm)
1 small rectangle for bottom of pocket (29 cm x 10 cm)
2 strap pieces for the top handles (35 cm long each)
5 strap pieces for the rings (5 cm long each)
2 long strap pieces (115 cm long each)

STEPS
1. To stiffen the bag, I ironed the fabric pieces with their corresponding interfacing (front, back, and bottom)
2. With the pocket, I sewed the 8" zipper to the small top strip, right sides together with a straight stitch
3. Then I flipped it open and added another straight stitch along the fold to hold it in place
4. I sewed the other side of the zipper right sides together to the bottom rectangle with a straight stitch
5. Then I flipped it open and added a straight stitch on the fold to hold it in place
6. I trimmed off the excess fabric that went beyond the zipper, which was about 1.5 cm on both sides
7. To give the pocket its 3D shape, I folded the corners and pinned them, then drew a line that was 2.5 cm long with a pencil.
8. I sewed along the lines I drew to form 4 corners
9. Placing the pocket on the front fabric square, I pinned the pocket to the centre and lower half of the stiff square. Through opening and closing it as I pinned, I tried to ensure it could stand out from the backpack while the stiff square lay flat
10. I sewed along these pins on the inside top and bottom of the pocket
11. On the pocket sides, I hand-sewed them to the front of the bag. I used pins to fix a fold in place (this helps things to stay straight), then used needle and thread
12. I sewed the bag front to the bottom, right sides together
13. Then I sewed the back to the bottom, right sides together
14. Due to the stiffness of the interfacing, I hammered the fabric as I held the desired fold along the seams in place (this worked really well!)
15. With the top handles, I folded in half along the midsection and sewed with a straight stitch, then tied off the threads on the inside so they would be hidden
16. I curved these along the top of the front and then marked their spot with a pencil. My bottom corners were 6 cm from the sides and 8.5 cm from the top
17. I sewed these in place with a rectangular stitch, but an X could be added in the middle to imitate Anello more closely
18. The five small strips were folded in half to cover all the D and triangle rings, then I used a straight stitch to seal them up
19. Each of these were sewn to the back of the bag, I had the D rings in the top middle and two sides, and the two triangle rings hidden under the straps
20. To close up the sides, I pinned the side pieces right sides together to the existing bag to sew it with a straight stitch
21. If you make it past this small war, I flipped the bag inside out and pushed out all the corners. The hammer was useful again to sharpen the seams with interfacing
22. To add the top zipper, I pinned it right sides together to the front and sewed with a straight stitch, stopping about 2.5 cm away from the middle of the sides
23. Then I pinned it to the back, right sides together, and sewed with a straight stitch. Again I stopped about 2.5 cm away from the middle of the sides
24. To assemble the backpack straps: first I added the slider, then added a hook, then inserted the strap back through the middle of the slider. This last section that folded over the middle of the slider was the part I sewed with a straight stitch
25. On the free end of the strap, I folded the strap over a hook to sew a loop that held it in place
Here's all the steps in video, if you make this please post it with #madewithwendy!