
DIY: Summer Dresses you DM'd Me
I asked you guys on Instagram what you would like me to make!
Here’s what a few of you sent in…


Honestly, the diversity of styles made me so fascinated and excited, I loved getting to see a snippet of everyone’s taste.


After receiving these two dresses in the submissions, they seemed like the perfect challenge for a summer dress.
Follow along with me as I DIY your DMS!
Here’s What you will need…
Lace Dress:
1.5 yards eyelet cotton
Invisible zipper
Matching thread
3 yards 1/4-3/8” contrast tie
Matching small elastic cording
Linen Dress:
1.5 yards of linen (I used a similar-weight satin)
Invisible zipper
Matching thread
Let’s begin…
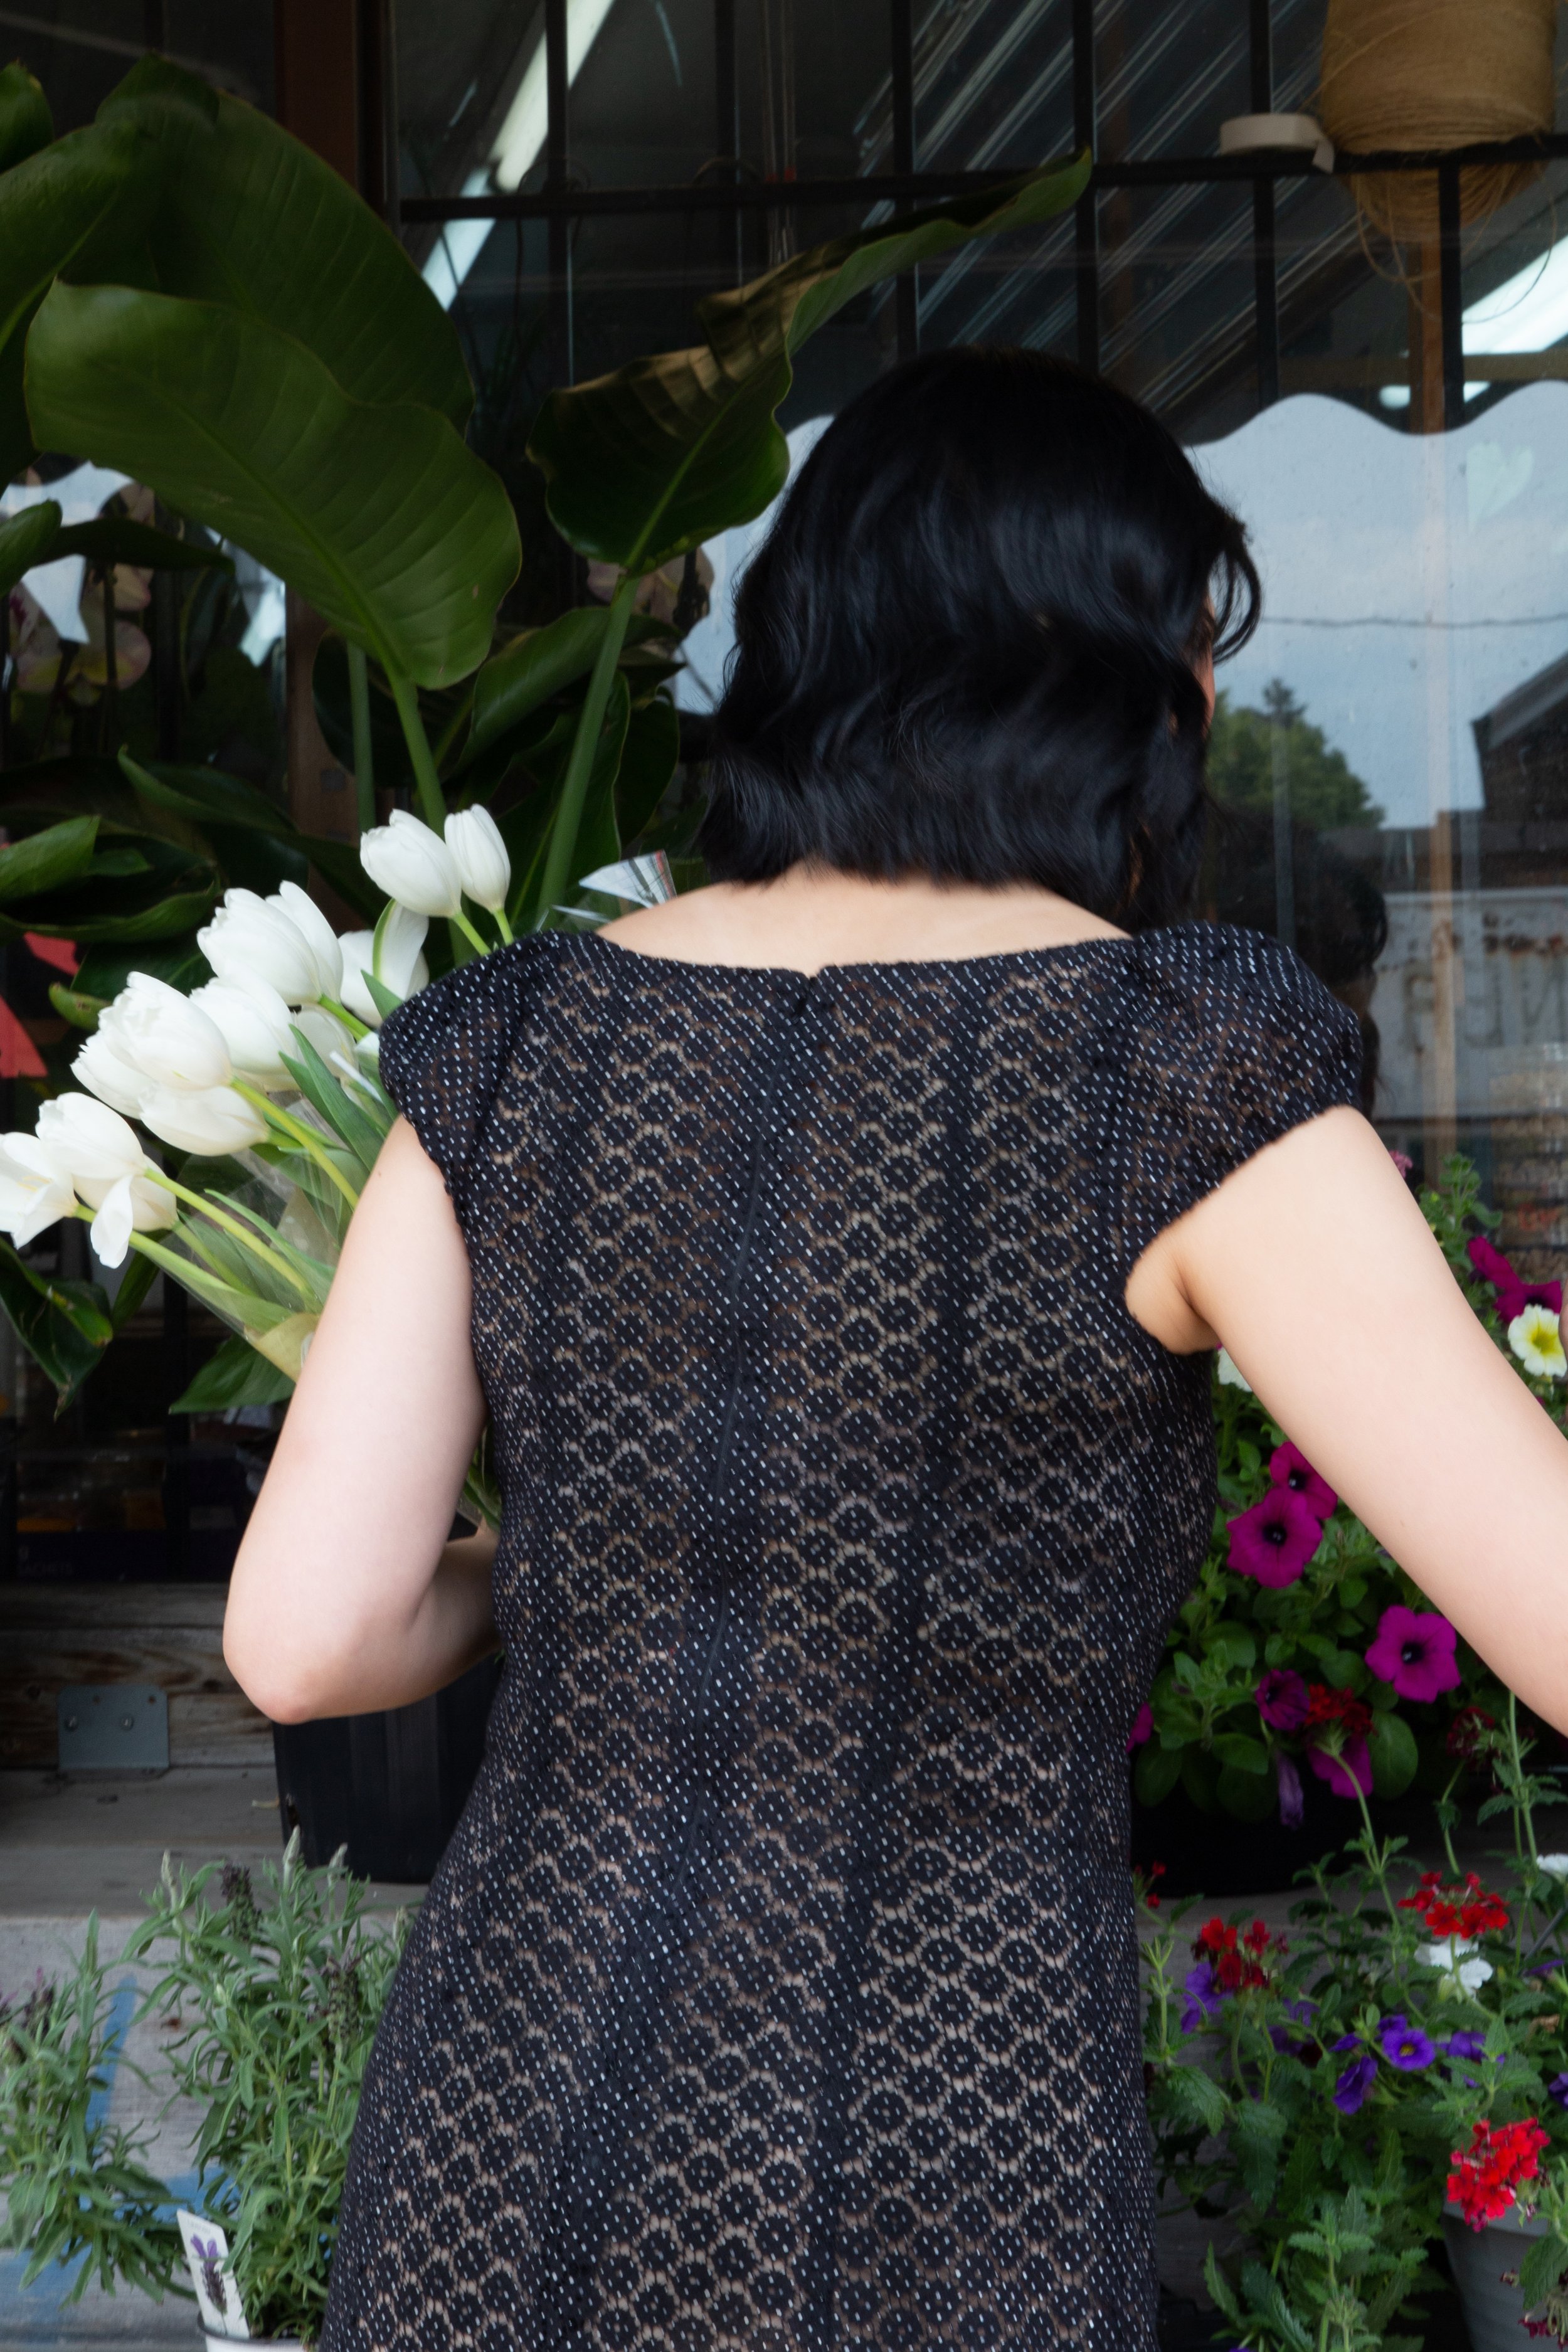
The Maria Rosa Dress

This dress has such a smooth, fitted look that really just hugs the body. There are a few things that can be done that can help a garment achieve such qualities… the first would be in the bust.
The use of the 3 ties gives support at the top of the bust, below the bust, and closer to the ribcage, giving you the perfect fit.
Another area of importance would be in the visible seams which help enunciate that hourglass shape.
The last part would be the cap sleeves. They are fitted really snugly around the shoulders to help keep everything tight, but still loose enough to keep it looking breathable.
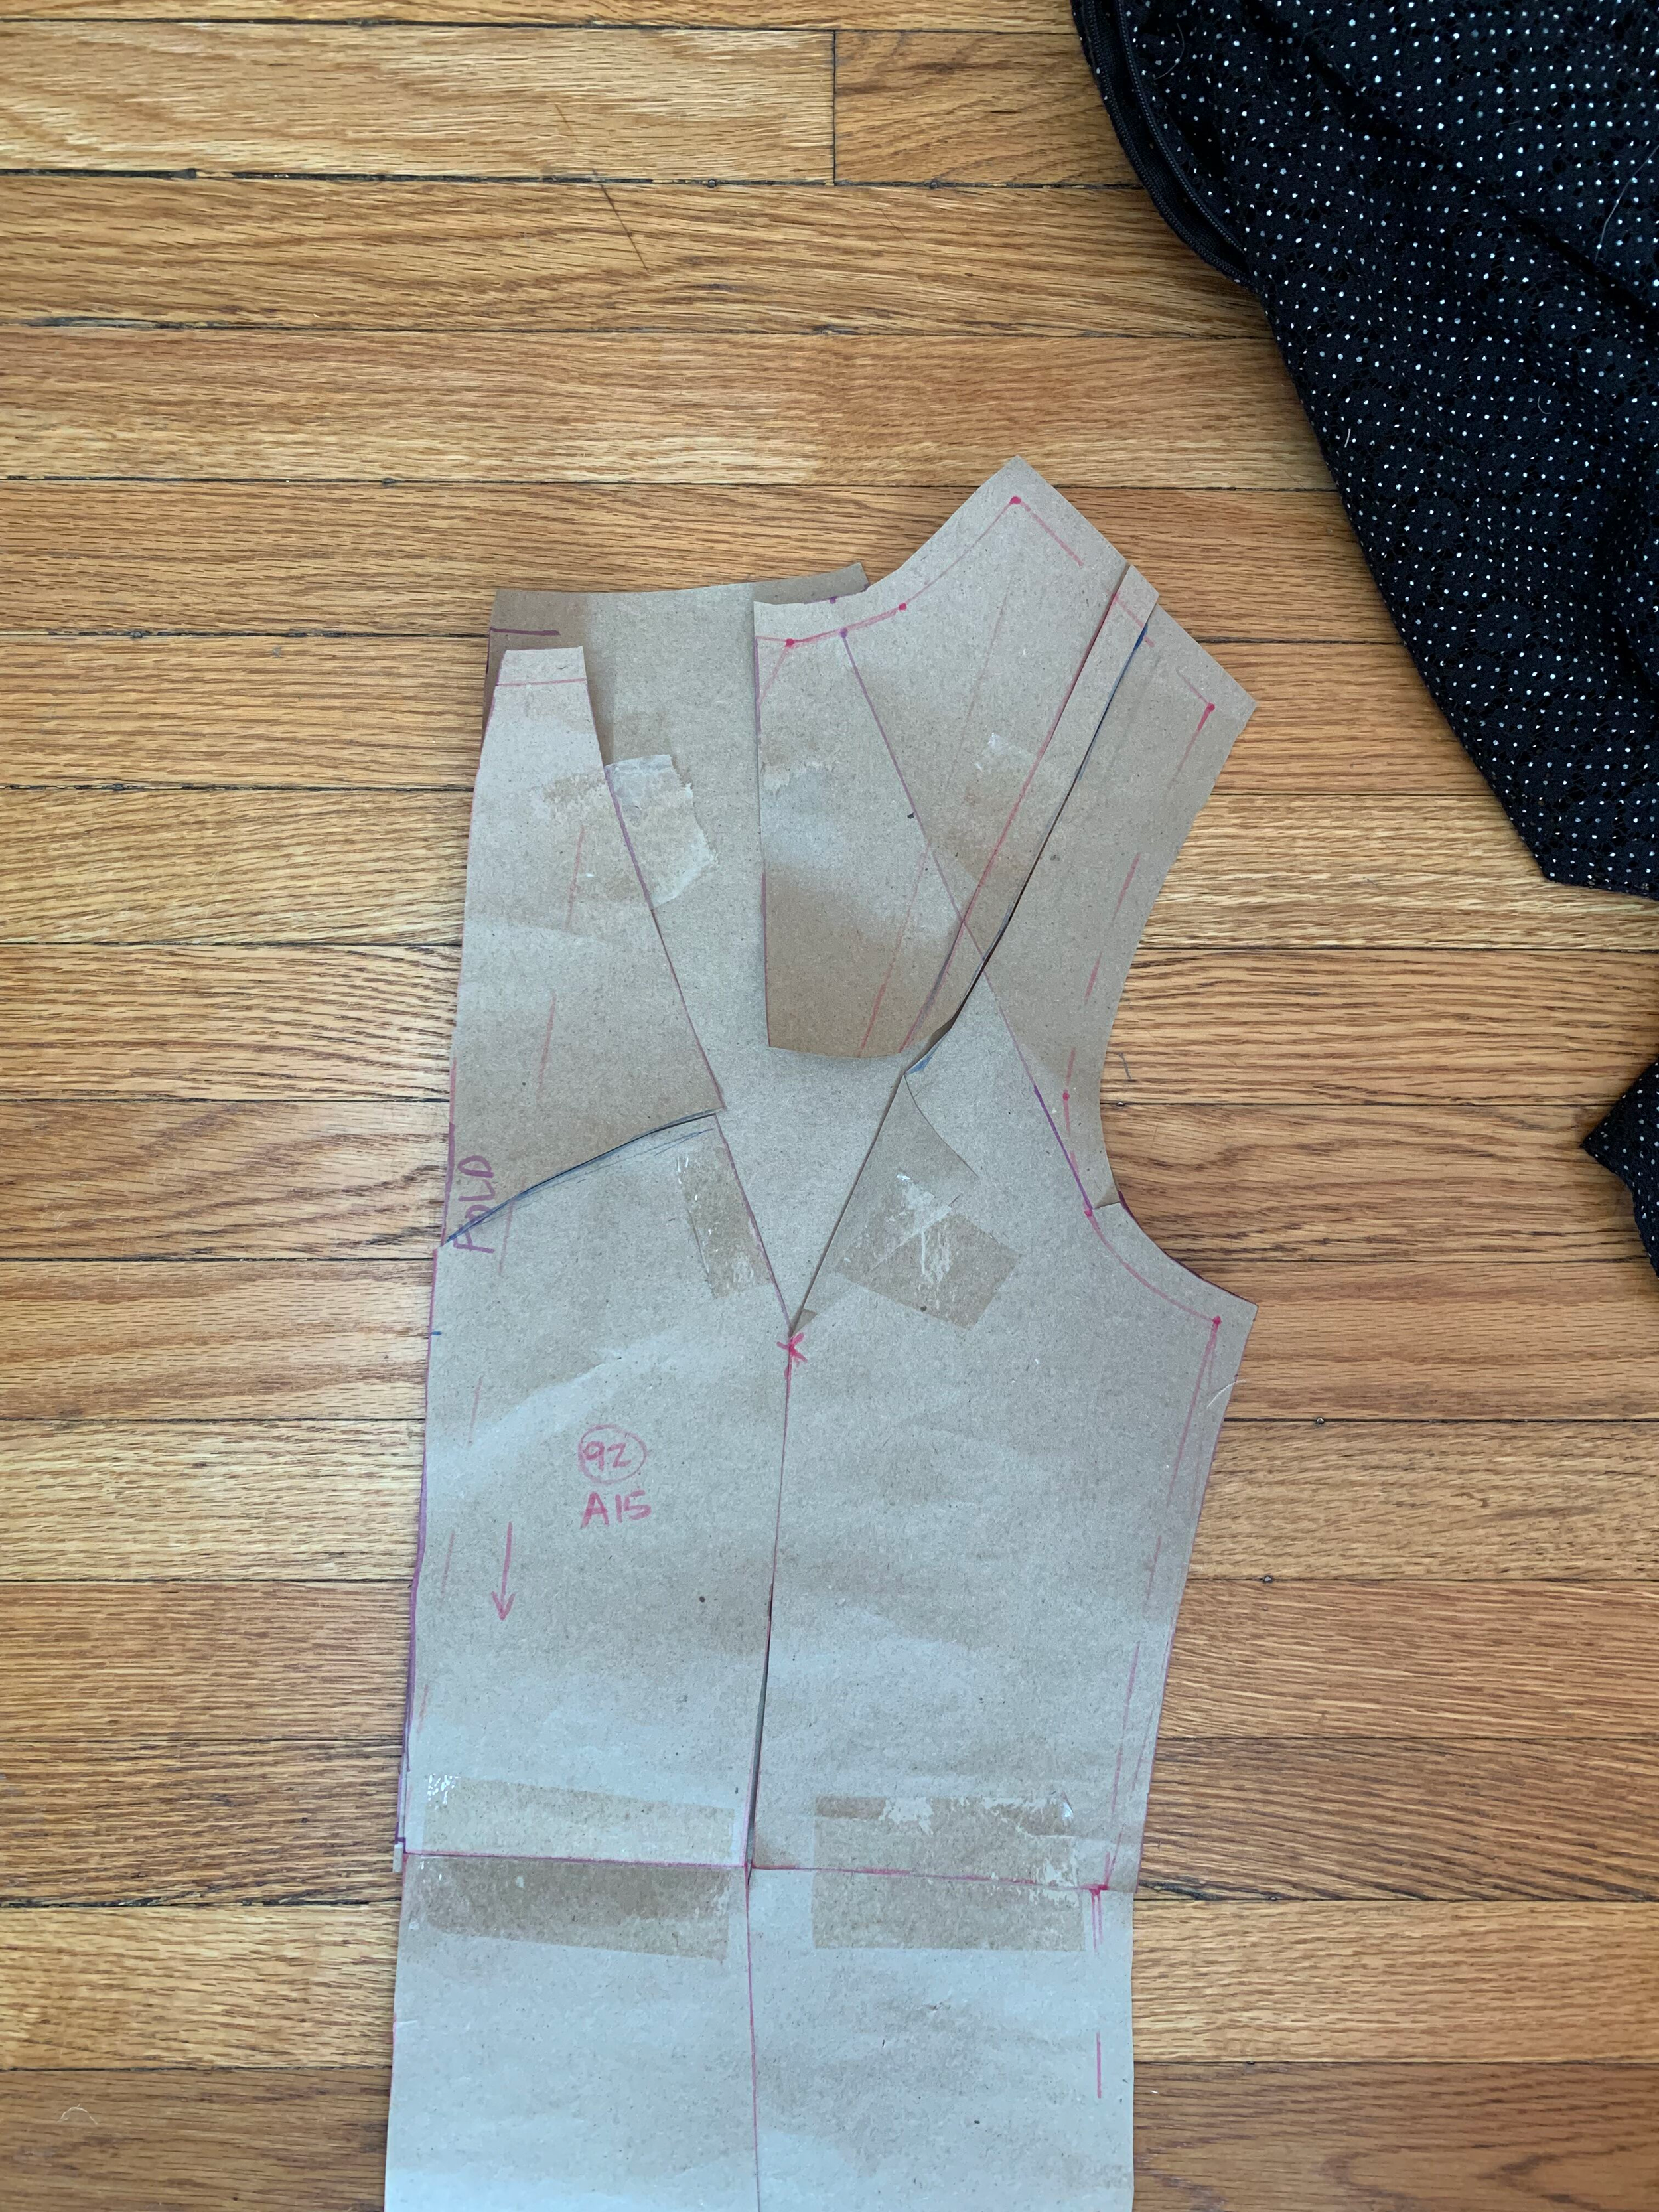
1. Using my Lutterloh kit, I drafted out my pattern and made a few changes to help achieve a more fitted design. I chose this black eyelet cotton with white polka dots as my material as it mimicked the similar eyelet design used in the example, but it also was more opaque so as to not show too much skin making it feel like a midnight wear, lingerie dress.
Before we get started, we should familiarize ourselves with a few techniques we will be doing…
Firstly, pattern manipulation. The neckline on this pattern needs to be redrawn to create a deeper neckline similar to the dress. Another technique we will be working on is slash and spread.
Slash and spread: a patternmaking technique used to add more volume to a garment. With this technique, you're gonna strategically slash your paper pattern to create more volume, so you can change the shape of a sleeve, a bodice, or even a dress.
The sleeves on the Lutterloh pattern are fitted, but the dress has a subtle gathering moment that happens at the top and bottom of the sleeves. We want most of the bulk happening at the top of the shoulder and on the outer edge of the sleeve, but none in the inner armpit.
Using slash and spread, recreate the sleeve pattern with room to gather, and redraw the sleeve pattern for easier use.


2. After creating our pattern, cut out the material.
3. Pin and sew the 3 front panels (one symmetrical centre piece and two symmetrical sides), ensuring your seam allowance is neat and minimal as it will be visible from the front.
4. Continue adding the 2 back panels (two symmetrical centre pieces and two symmetrical sides), leaving an opening for the zipper.


6. Try on and make any adjustments as needed. I tightened the darts on the front of the dress and cut away excess material around the neckline. To do. so, cut and measure the first amount taken off on one side, and overlap it on the other side to ensure there is the same amount being taken off.
7. Gather the sleeves. I am using the longest stitch length to sew a gathered stitch.
8. Pull the gather at the top of the sleeves where it connects to the shoulders. Sew the gather in place.
9. Close the sleeve shut.


10. Insert the sleeve inside the dress, making sure the right sides are touching each other.
11. Align the top and bottom seams of the sleeve with the top and bottom seams of the arm hole, moving the material around.
12. Sew the sleeves onto the bodice and repeat on the other side.
13. Try on the dress to check that the gather placement at the top of the sleeve looks good.
14. Measure and cut the correct amount of elastic to close the bottom of the sleeve.
15. Using a zigzag stitch, secure the elastic to the sleeve.
16. Fold it over, and use another zigzag stitch to lock it in place.


17. Turn the dress wrong side out and pin the center middle of the bust so it lays flat for cutting symmetrically.
18. Measure the amount you would like to take away, creating a U shape curving upwards. I cut about half a centimeter away for a smaller opening.
19. Hem the front opening.
20. Measure where you’d like your ribbons to sit and bar-tack them in place on either side.


The final look of the Maria Dress …


up next…
The Dory Dress

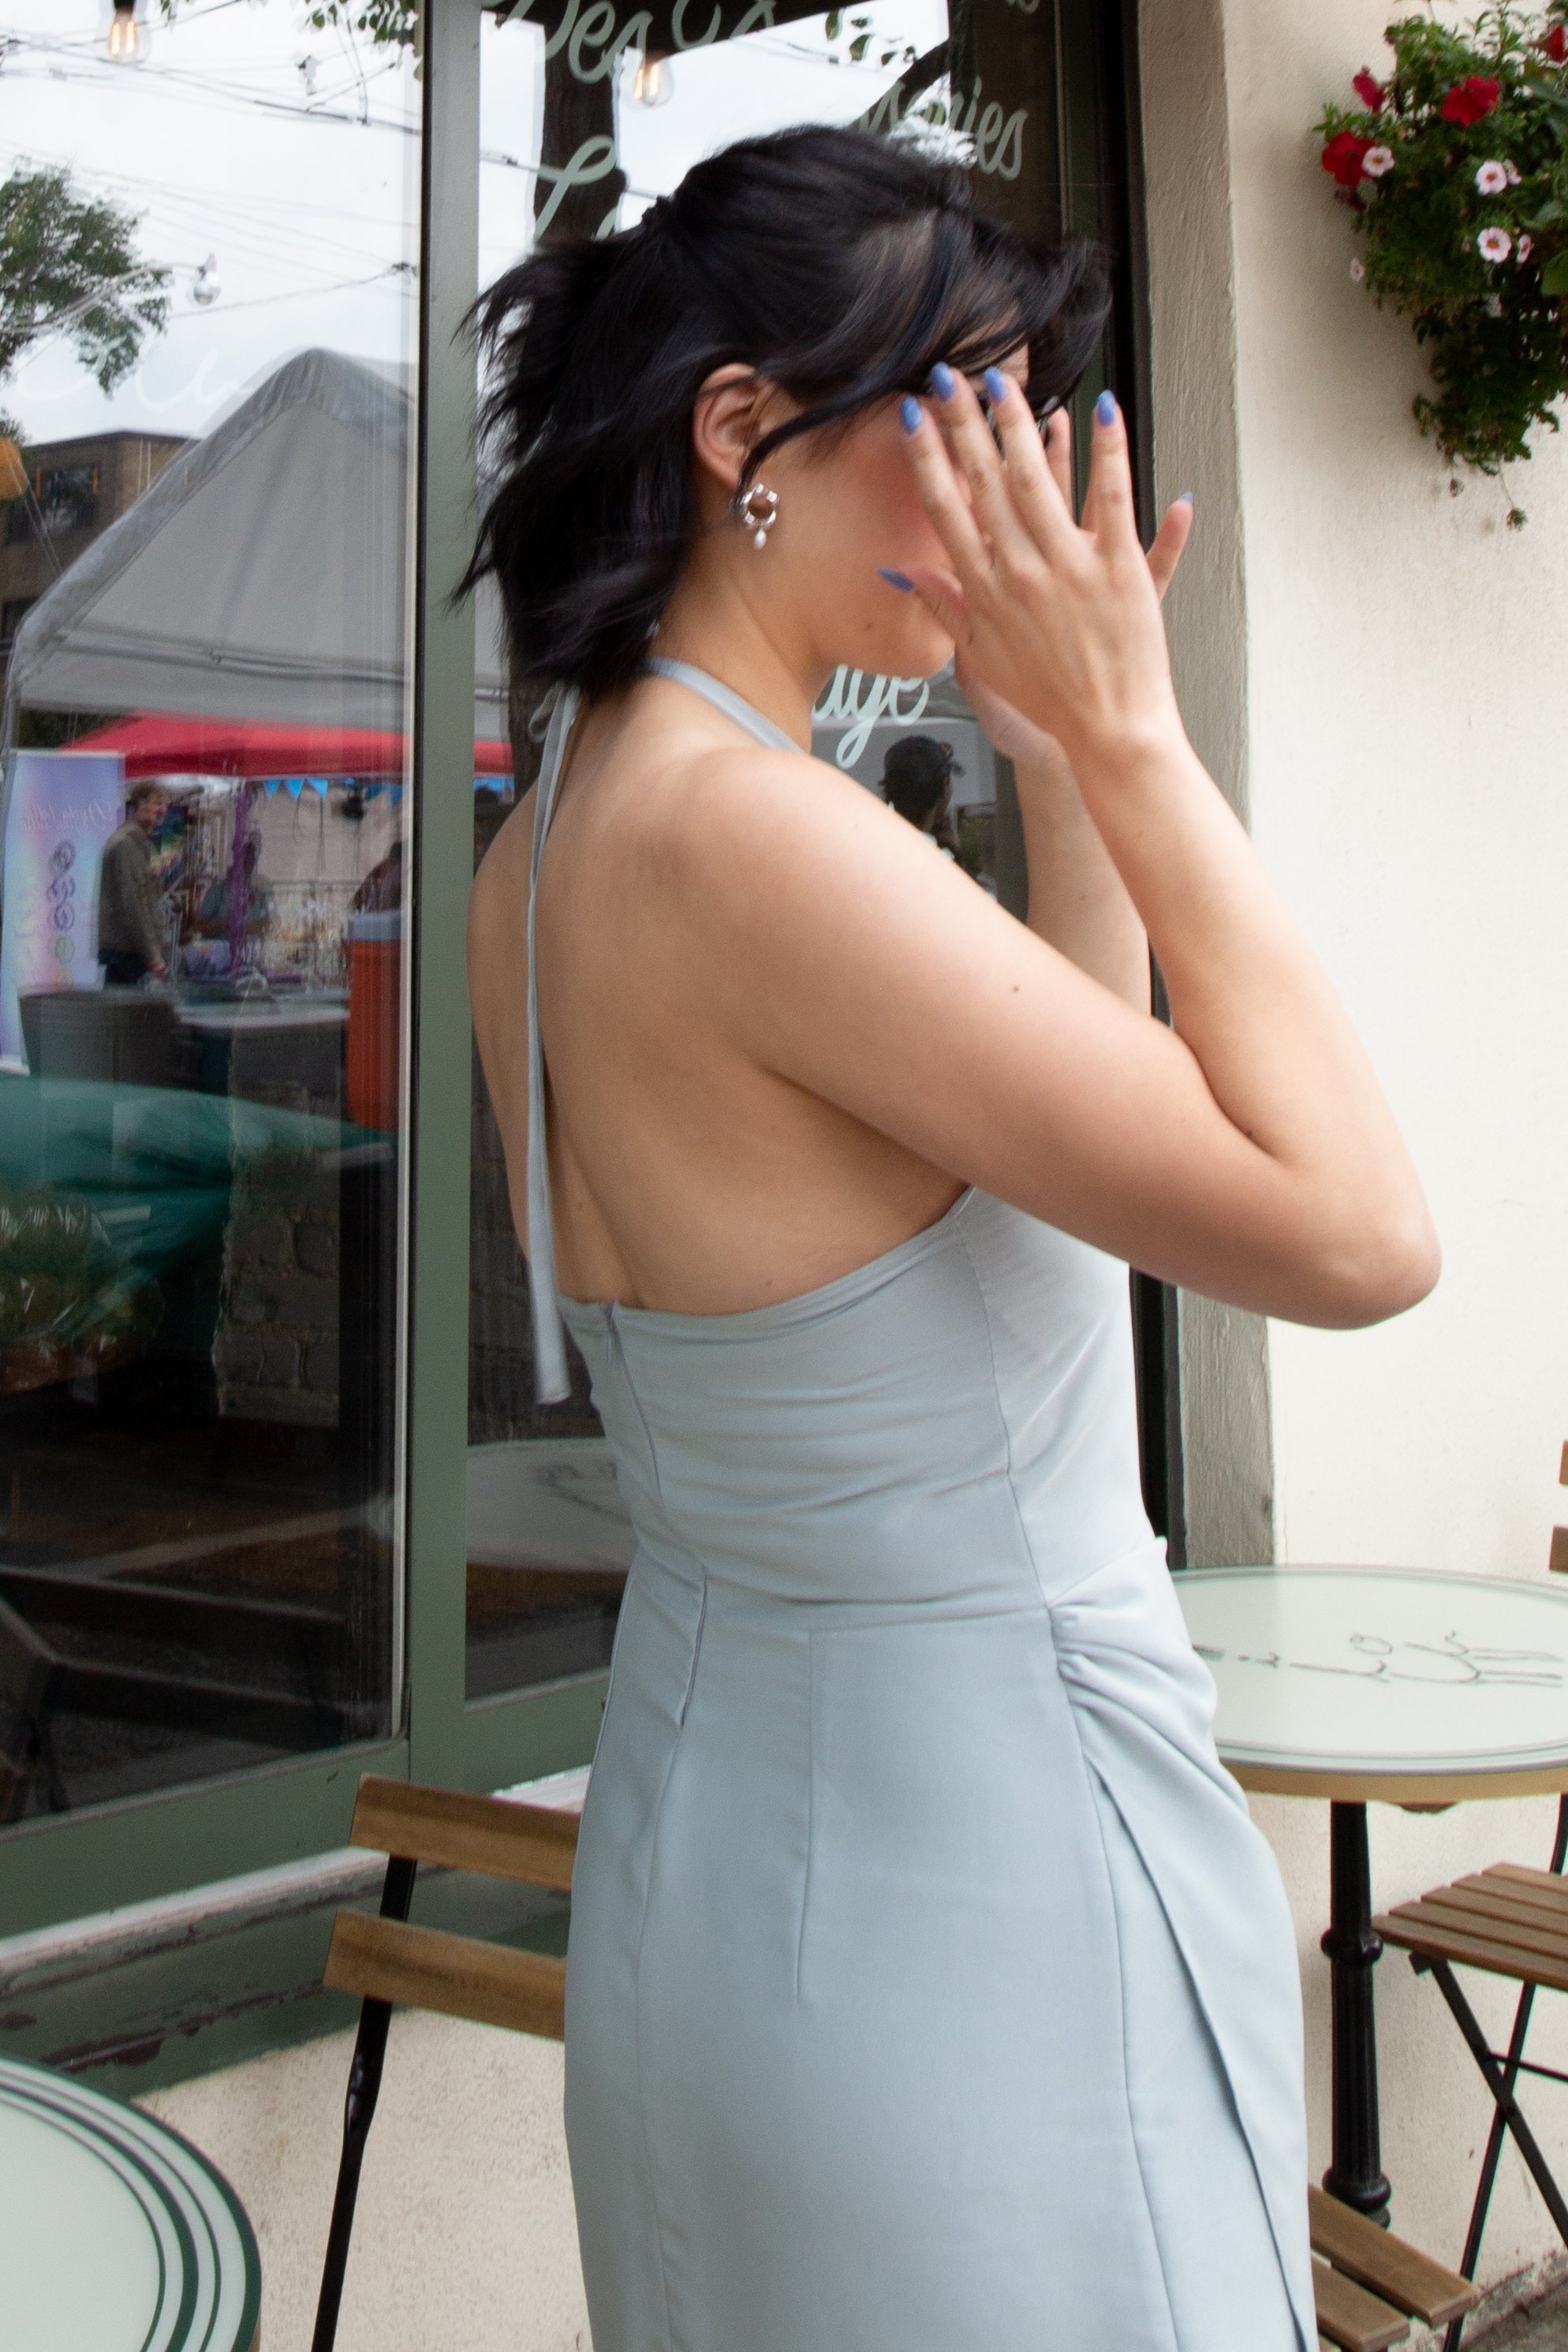
For this next dress, we are going to be practicing some more slash and spread in the waist of the dress, dart manipulation at the chest, pleating in the top neckline, and creating a backless halter.
1. Using the same pattern as the black dress, create a new neckline from the armhole of the pattern to the middle of the neckline. I also found another Lutterloh pattern to help draft out the front gathered flap.
2. Close the existing dart in the body, opening up the neckline creating a smaller waist and straight middle seam.
3. The bottom of the skirt is similar to a simple pencil skirt with one dart on the back. Create a slash and spread flap with no darts to overlap on the front.


4. Cut the pattern out after all the changes are made and copy it onto your fabric.
5. Sew the darts shut.
6. Press the darts pointing away from the center of the body.


7. Create a gathering stitch at the top of the flap and baste it in place to the front panel.
8. Attach the back to the front with the gathered flap in place.
9. Pin the front of the bodice to the back panels, and sew shut.
10. Sew the bodice to the skirt.


11. Sew the zipper to the dress. I used a smaller zipper which made it difficult to put on and take off, opt for a longer zipper for easier wear.
12. Check the fit of the dress.
13. Create your front pleats, pinning them in place.
14. Ensure fit in the chest and arm area are good. Trim any excess material.


15. Create the neck strap. Cut 1.5cm x 65cm.
16. Fold the strap in half, sew shut, and trim any excess material.
17. Using a loop turner, turn the strap right side out. Click here for a detailed video on how to use a loop-turner.


18. Hand sew the ends, turning the seam allowance inside the strap and using a blind stitch to close it.
19. Press the strap.
20. Attach the strap to the dress.
21. Using a top stitch, top stitch the pleats and inner yoke to help keep the yoke in place.
22. Hand tack the bust of the dress, connecting the yoke and pleats through the front, hiding the tacks inside the pleats so it is not visible, but still support the neckline in place.


The final look of the Dory dress…
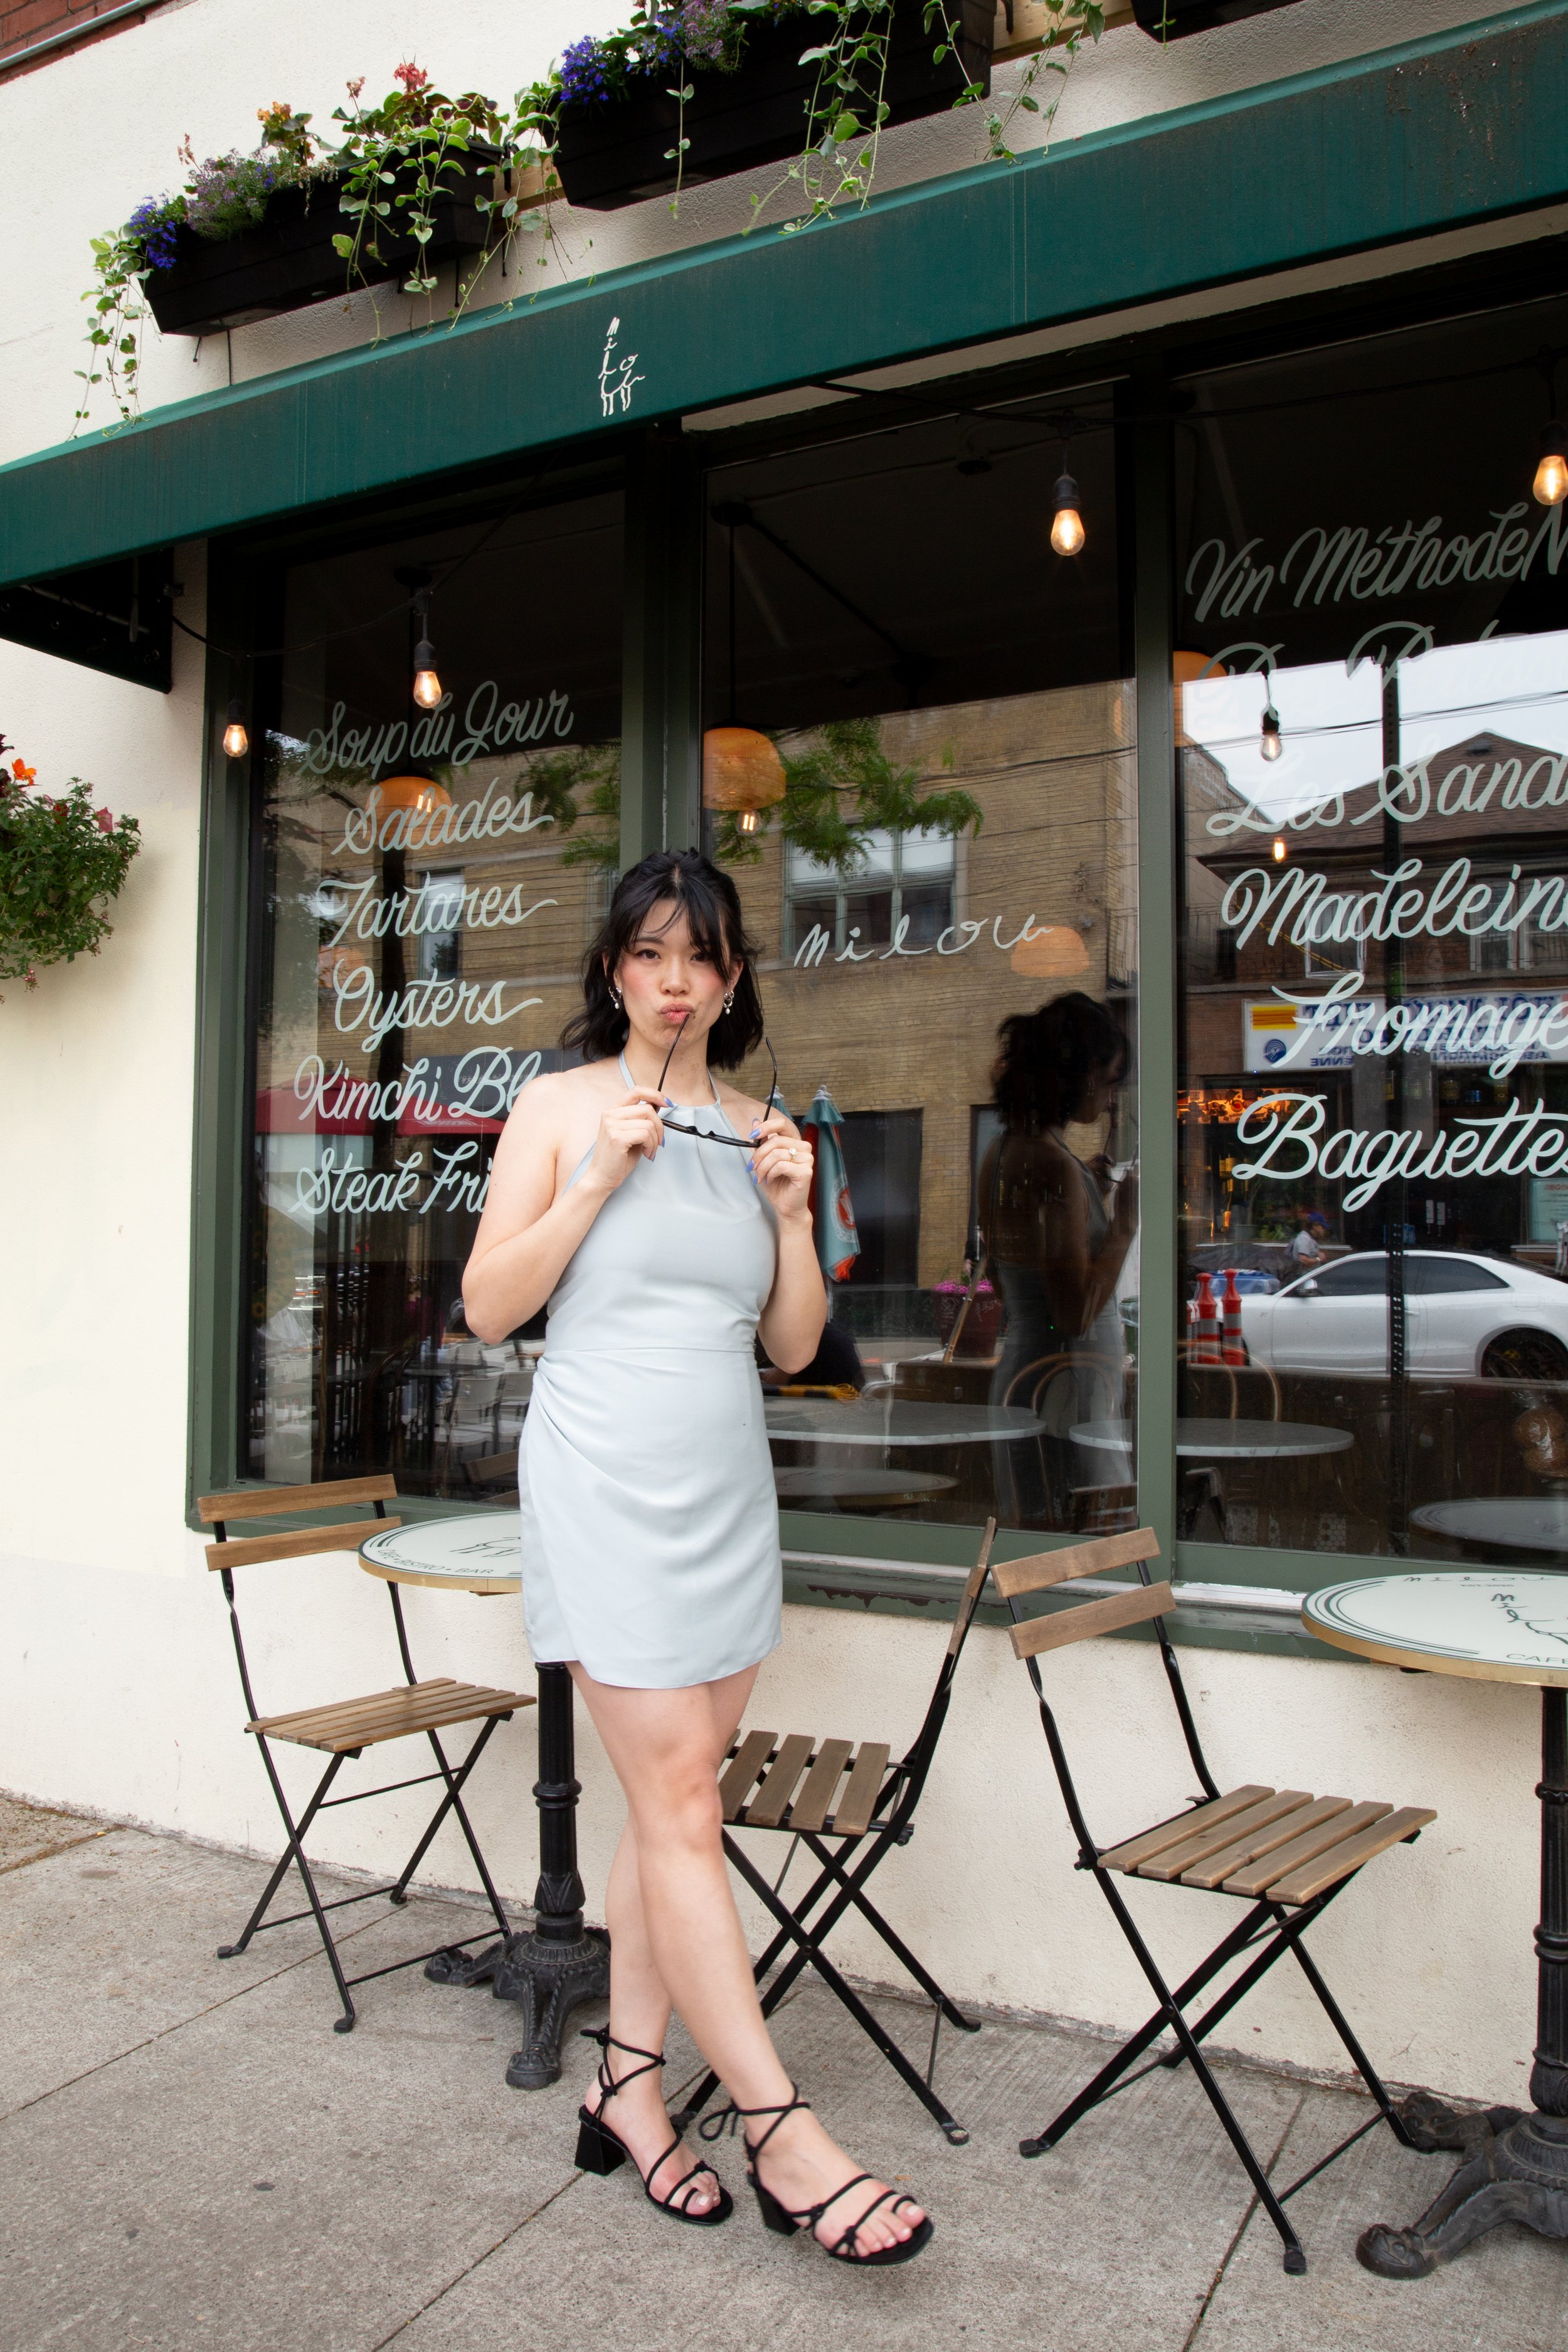
The shoot…


I loved how both of these dresses turned out! I think if I were to try this one again, I’d pick a different material for the Dory dress, it ended up being a bit too tight on me.
If you would like to watch me struggle to put this dress on and off my dress form, watch my video & follow along to see why satin was maybe not the best choice…